
I have these stitch markers that I really like.

They fit on the needle or can be clipped to the stitch and left in the work until you need to remove them. They're flexible and pretty darn great. Plus they're colorful like unicorn farts. The only downfall is that the bean tends to find them and eat them and I pretty much refuse to go diaper excavating. If I witness a bit of shiny purple at change time I cringe a little. They weren't horribly spendy, but they did ship from Canada and I hate waste.
Several weeks ago I happen to find these at Joann's in the jewelry supplies:

Woohoo! It was a total light bulb moment. I could make a whole lotta stitch markers out of these little packs. And even better they were on sale, so for what I paid for a single set of stitch markers I'm going to have a ready supply on hand. If you've ever wondered, this is proof that even after you've found what you went in for you should continue to roam around because you will find something you didn't know you needed when you walked in the doors.
You'll have to find some wire clippers. I have some nice jewelry making ones somewhere, but I dug these out of the tool box.

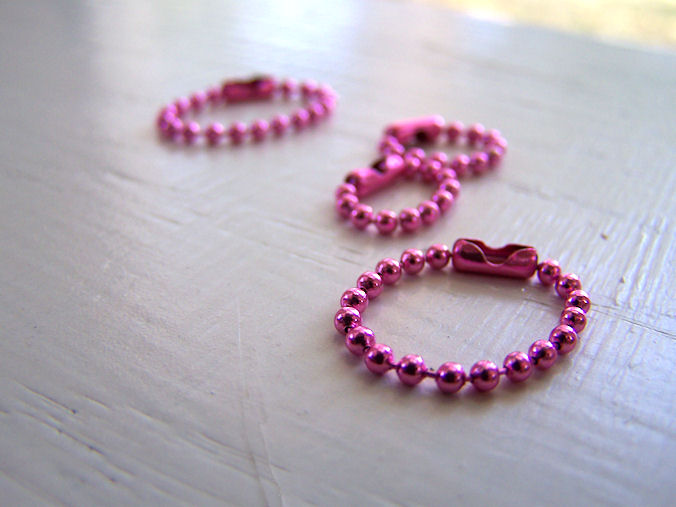
Pull out one of the chains and clip of a few lengths. The smaller ones are 13 balls long and the bigger ones are 20. I mostly use the smaller sized ones, but occasionally you have a project with bigger needles. The bigger ones are good for clipping all the smaller ones to and sometimes you need a marker that's different, so multiple sizes come in handy.
 |
| Ignore the piece of paintbrush that got stuck in the finish of the cabinet top. |
Once you've clipped your pieces of ball chain you just take your clasps and turn them into rounds. Viola simple functional stitch markers! Now you can have twice as many WIPs on the needles.
Happy crafting,

No comments:
Post a Comment